From eScan Wiki
(Difference between revisions)
| Revision as of 06:21, 30 June 2012 Webmktg (Talk | contribs) (→<b>Scan</b>) ← Previous diff |
Revision as of 03:41, 2 July 2012 WikiSysop (Talk | contribs) Next diff → |
||
| Line 18: | Line 18: | ||
| {| class="wikitable" border="0" | {| class="wikitable" border="0" | ||
| |} | |} | ||
| - | <h2 id="mp-tfp-h2" style="margin:0; background:#95C33D; font-size:120%; font-weight:bold; border:10 solid #afa3bf; text-align:left; color:#000; padding:0.2em 0.4em">eScan Anti-Virus for Mac Version 5.x Online Help</h2> | + | <h2 id="mp-tfp-h2" style="margin:0; background:#95C33D; font-size:120%; font-weight:bold; border:10 solid #afa3bf; text-align:left; color:#000; padding:0.2em 0.4em">eScan Anti-Virus Security for Mac Version 5.x Online Help</h2> |
| {| class="wikitable" border="0" | {| class="wikitable" border="0" | ||
| |- | |- | ||
Revision as of 03:41, 2 July 2012
| · eScan · MailScan · Technologies | · Technical Info · Security Awareness · User Guides |
eScan Anti-Virus Security for Mac Version 5.x Online Help
Scan
Contents |
Scan
The Scan module helps you to perform on-demand scanning on the selected files/directories, home directories, and my computer. Apart from system scanning, you can scan all the connected USB’s and CD-ROM devices, through auto and manual scan feature. You have various options to set for eScan to take action when any viruses are detected. The logs of scanning can be located at a specific location with a level of log you want to view. You can quarantine the suspected or infected files, and also perform real-time monitoring on files and reports.
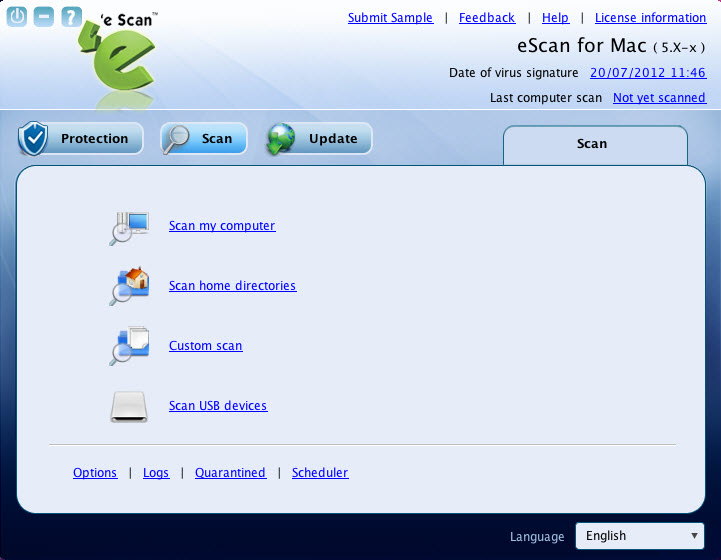
Click this module, to access the scan screen. On the screen, you can configure the following settings:
- Scan Options:
- Scan My Computer: Click this link, if you want to scan the entire system.
- Scan home directories: Click this link, if you want to scan all files and folders of home directories of the logged in user.
- Custom Scan: Click this link, if you want to scan specific files/ directories.
- Scan USB devices: Click this link, if you want to scan any specific USB storage devices like Pen drive, CD-ROM device, and so on. Automatic scanning of the USB storage devices, as and when it is connected and mounted, is always active by default.
- Additional Options:
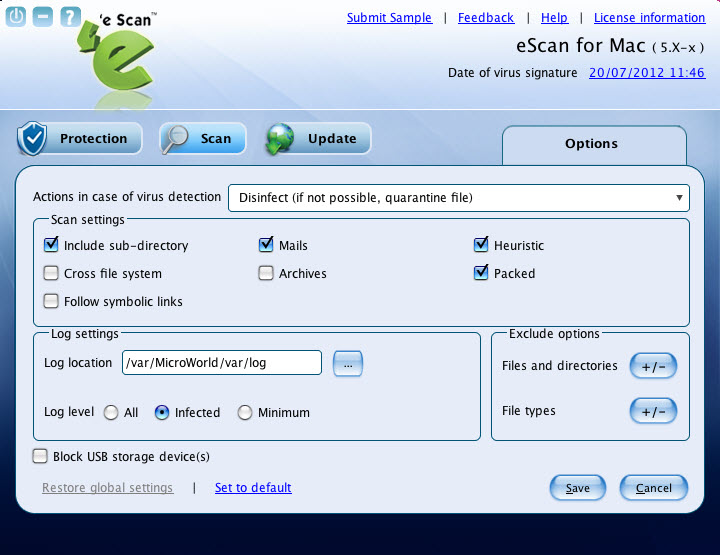
- Options:
- Click this link, if you want to configure settings for virus detection. During scanning a log is created, which you can save at your preferred location. The Log level option helps you decide on, whether you want to log information about infected files, all files, or minimum information. If you want to block all connected USB’s and CD-ROM storage devices from scanning, then select Block USB storage device(s) check box.
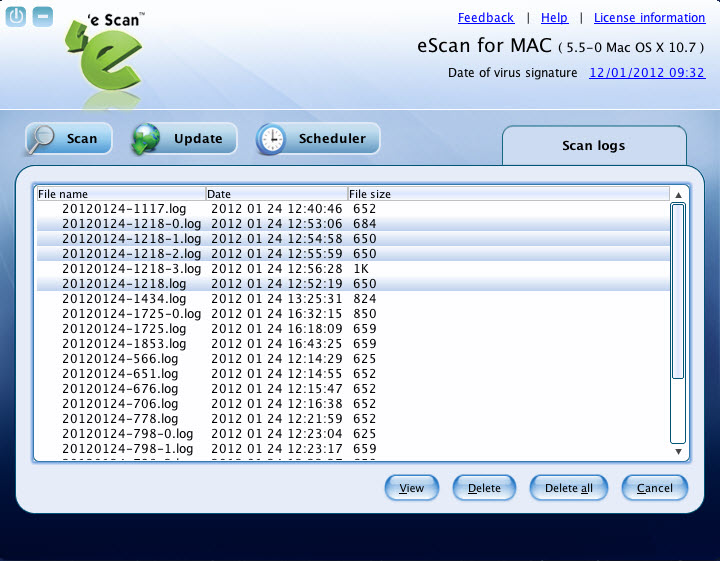
- Logs:
- Click this link, if you want to view and delete the scan log. It displays log list of the scanned files with file name, date, and file size.
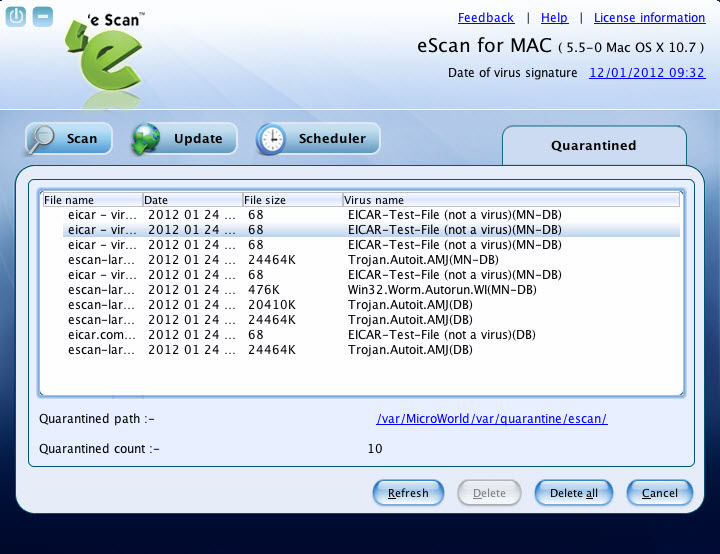
- Quarantined:
- Click this link, if you want to view and delete the infected files. It displays the list of infected files that have been quarantined with file name, date, file size, and virus name. It also displays the path where quarantined files are saved with number of quarantined files.
- Monitor:
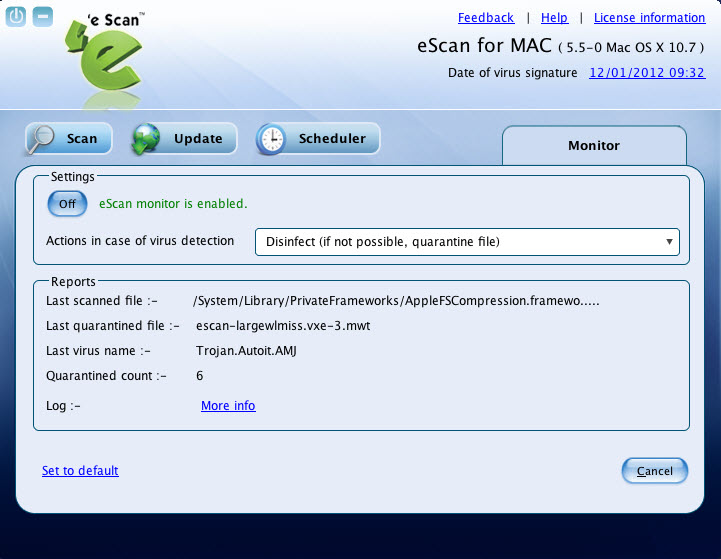
- By default, real-time monitoring starts after you add a license key. This link is available only for an administrator. Click this link, if you want to configure settings for real-time monitor. You can enable or disable eScan monitor and set the action you want eScan to take when any virus is detected. eScan provides automatic eScan virus alert pop-ups, whenever any viruses are detected by eScan monitor, provided monitor is in On mode.
