From eScan Wiki
| Revision as of 10:05, 24 June 2015 Webmktg (Talk | contribs) ← Previous diff |
Revision as of 10:43, 24 June 2015 Webmktg (Talk | contribs) Next diff → |
||
| Line 21: | Line 21: | ||
| SMTP Port – Alert email will be sent using this SMTP port | SMTP Port – Alert email will be sent using this SMTP port | ||
| Monitor SMTP server – Enter SMTP server details i.e. IP addressnd port which you wish to monitor. | Monitor SMTP server – Enter SMTP server details i.e. IP addressnd port which you wish to monitor. | ||
| - | <h2><b>Deployment status</b> </h2> | + | <h2><b>How to Monitor email queue and SMTP service in MailScan?</b> </h2> |
| + | |||
| + | Execute Notification.exe file from \Program Files <x86>\MailScan folder | ||
| + | |||
| + | | ||
| + | [[Image:Send Notification.jpeg|center]] | ||
| + | | ||
| + | |||
| + | |||
| + | Click on *Edit* and add relevant settings as shown below | ||
| + | Threshold Number – Number of emails in Out Queue, when crossed, an alert is to be generated. | ||
| + | Frequency (in Minutes0 –The monitoring will happen as per set frequency and alert will be triggered as per current condition. | ||
| + | Sender – Alert email will be sent using this as “From Id” | ||
| + | Recipient – Alert email will be sent to this email id. | ||
| + | SMTP Server – Alert email will be sent to this IP | ||
| + | SMTP Port – Alert email will be sent using this SMTP port | ||
| + | Monitor SMTP server – Enter SMTP server details i.e. IP addressnd port which you wish to monitor. | ||
| | | ||
| Line 28: | Line 44: | ||
| To customize alert emails as per requirement, click on *Alert Customisation* | To customize alert emails as per requirement, click on *Alert Customisation* | ||
| - | | + | |
| [[Image:Alert Customisation.jpeg|center]] | [[Image:Alert Customisation.jpeg|center]] | ||
| | | ||
| Add relevant details and “Save” the settings. | Add relevant details and “Save” the settings. | ||
| - | + | | |
| - | | + | |
| [[Image:Alert Customisation2.jpeg|center]] | [[Image:Alert Customisation2.jpeg|center]] | ||
| | | ||
| Line 40: | Line 55: | ||
| Once all settings are configured, click *Start Monitoring* which will activate the module. | Once all settings are configured, click *Start Monitoring* which will activate the module. | ||
| - | | + | |
| [[Image:Send Notification3.jpeg|center]] | [[Image:Send Notification3.jpeg|center]] | ||
| | | ||
| Line 46: | Line 61: | ||
| Application can be minimized to windows tray. | Application can be minimized to windows tray. | ||
| - | | + | |
| [[Image:Application windows tray.jpeg|center]] | [[Image:Application windows tray.jpeg|center]] | ||
| | | ||
Revision as of 10:43, 24 June 2015
MailScan version 6.x
SMTP service and Queue monitoring
Contents |
How to Monitor email queue and SMTP service in MailScan?
Click on *Edit* and add relevant settings as shown below Threshold Number – Number of emails in Out Queue, when crossed, an alert is to be generated. Frequency (in Minutes0 –The monitoring will happen as per set frequency and alert will be triggered as per current condition. Sender – Alert email will be sent using this as “From Id” Recipient – Alert email will be sent to this email id. SMTP Server – Alert email will be sent to this IP SMTP Port – Alert email will be sent using this SMTP port Monitor SMTP server – Enter SMTP server details i.e. IP addressnd port which you wish to monitor.
How to Monitor email queue and SMTP service in MailScan?
Execute Notification.exe file from \Program Files <x86>\MailScan folder
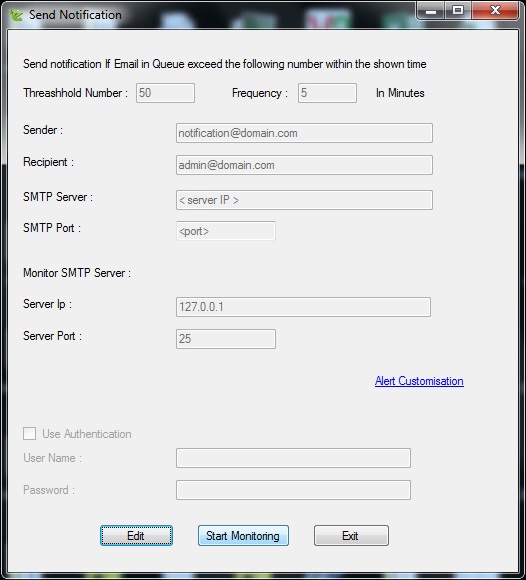
Click on *Edit* and add relevant settings as shown below
Threshold Number – Number of emails in Out Queue, when crossed, an alert is to be generated.
Frequency (in Minutes0 –The monitoring will happen as per set frequency and alert will be triggered as per current condition.
Sender – Alert email will be sent using this as “From Id”
Recipient – Alert email will be sent to this email id.
SMTP Server – Alert email will be sent to this IP
SMTP Port – Alert email will be sent using this SMTP port
Monitor SMTP server – Enter SMTP server details i.e. IP addressnd port which you wish to monitor.
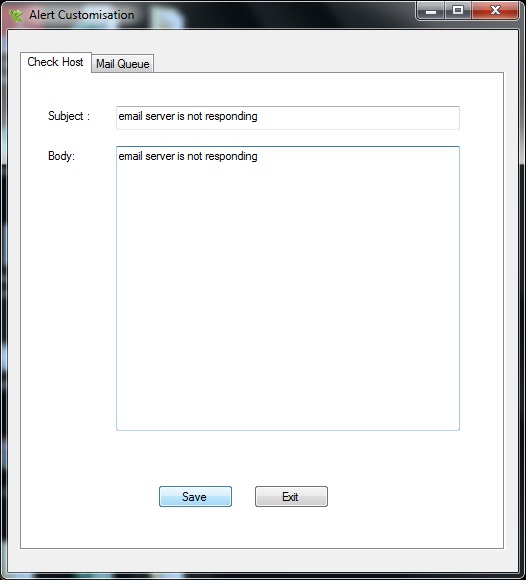
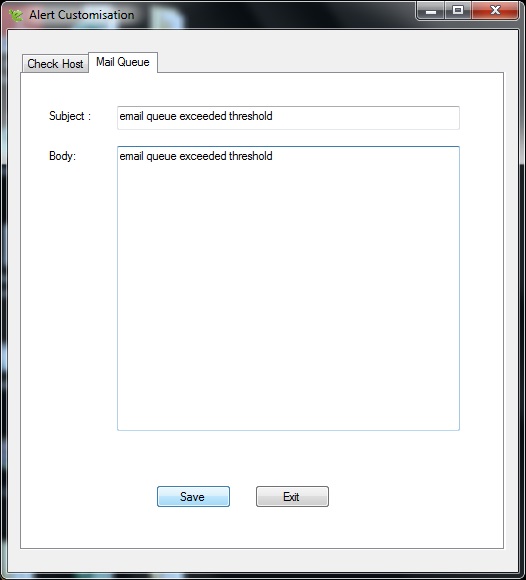
To customize alert emails as per requirement, click on *Alert Customisation*
Add relevant details and “Save” the settings.
Once all settings are configured, click *Start Monitoring* which will activate the module.
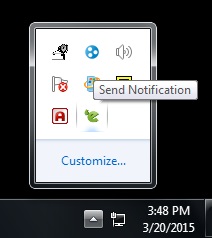
Application can be minimized to windows tray.


