From eScan Wiki
(Difference between revisions)
| Revision as of 10:48, 23 June 2015 Webmktg (Talk | contribs) ← Previous diff |
Current revision Webmktg (Talk | contribs) |
||
| Line 4: | Line 4: | ||
| <h2 id="mp-tfp-h2" style="margin:0; background:#95C33D; font-size:120%; font-weight:bold; border:10 solid #afa3bf; text-align:left; color:#000; padding:0.2em 0.4em">SMTP service and Queue monitoring</h2> | <h2 id="mp-tfp-h2" style="margin:0; background:#95C33D; font-size:120%; font-weight:bold; border:10 solid #afa3bf; text-align:left; color:#000; padding:0.2em 0.4em">SMTP service and Queue monitoring</h2> | ||
| + | |||
| + | __TOC__ | ||
| + | <br> | ||
| + | |||
| + | |||
| + | <h2><b>How to Monitor email queue and SMTP service in MailScan?</b> </h2> | ||
| + | |||
| + | Execute Notification.exe file from \Program Files <x86>\MailScan folder | ||
| + | |||
| + | | ||
| + | [[Image:Send Notification.jpeg|center]] | ||
| + | | ||
| + | |||
| + | |||
| + | Click on *Edit* and add relevant settings as shown below | ||
| + | <ul> | ||
| + | <li>Threshold Number – Number of emails in Out Queue, when crossed, an alert is to be generated.</li> | ||
| + | <li>Frequency (in Minutes) –The monitoring will happen as per set frequency and alert will be triggered as per current condition.<l/i> | ||
| + | <li>Sender – Alert email will be sent using this as “From Id”</li> | ||
| + | <li>Recipient – Alert email will be sent to this email id.</li> | ||
| + | <li>SMTP Server – Alert email will be sent to this IP</li> | ||
| + | <li>SMTP Port – Alert email will be sent using this SMTP port</li> | ||
| + | <li>Monitor SMTP server – Enter SMTP server details i.e. IP address and port which you wish to monitor.</li> | ||
| + | |||
| + | | ||
| + | [[Image:Send Notification2.jpeg|center]] | ||
| + | | ||
| + | |||
| + | To customize alert emails as per requirement, click on *Alert Customisation* | ||
| + | | ||
| + | [[Image:Alert Customisation.jpeg|center]] | ||
| + | | ||
| + | |||
| + | Add relevant details and “Save” the settings. | ||
| + | | ||
| + | [[Image:Alert Customisation2.jpeg|center]] | ||
| + | | ||
| + | |||
| + | Once all settings are configured, click *Start Monitoring* which will activate the module. | ||
| + | |||
| + | | ||
| + | [[Image:Send Notification3.jpeg|center]] | ||
| + | | ||
| + | |||
| + | Application can be minimized to windows tray. | ||
| + | |||
| + | | ||
| + | [[Image:Application windows tray.jpeg|center]] | ||
| + | | ||
Current revision
[edit]
MailScan version 6.x
[edit]
SMTP service and Queue monitoring
Contents |
[edit]
How to Monitor email queue and SMTP service in MailScan?
Execute Notification.exe file from \Program Files <x86>\MailScan folder
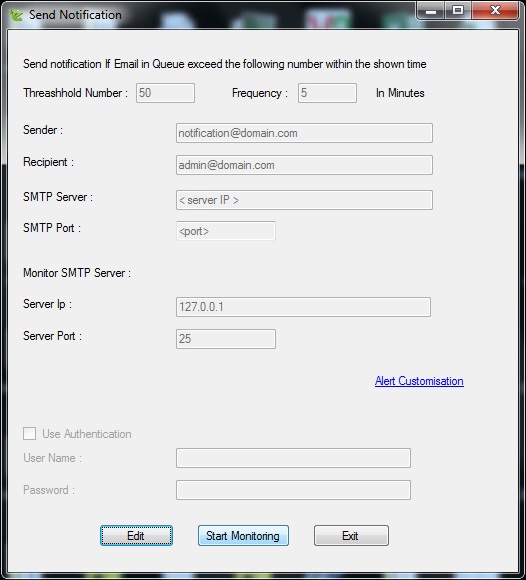
Click on *Edit* and add relevant settings as shown below
- Threshold Number – Number of emails in Out Queue, when crossed, an alert is to be generated.
- Frequency (in Minutes) –The monitoring will happen as per set frequency and alert will be triggered as per current condition.<l/i> <li>Sender – Alert email will be sent using this as “From Id”
- Recipient – Alert email will be sent to this email id.
- SMTP Server – Alert email will be sent to this IP
- SMTP Port – Alert email will be sent using this SMTP port
- Monitor SMTP server – Enter SMTP server details i.e. IP address and port which you wish to monitor.
To customize alert emails as per requirement, click on *Alert Customisation*
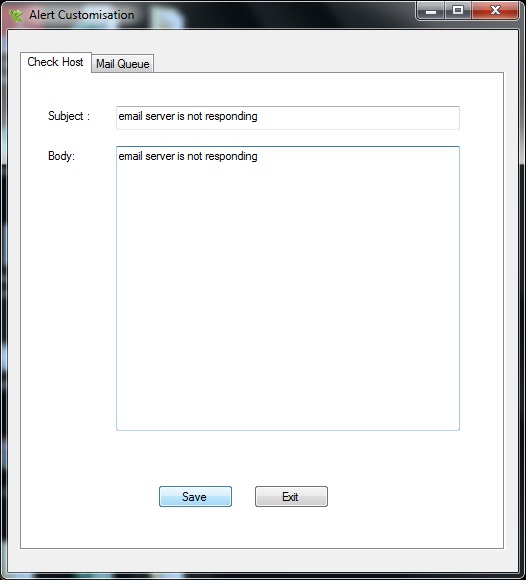
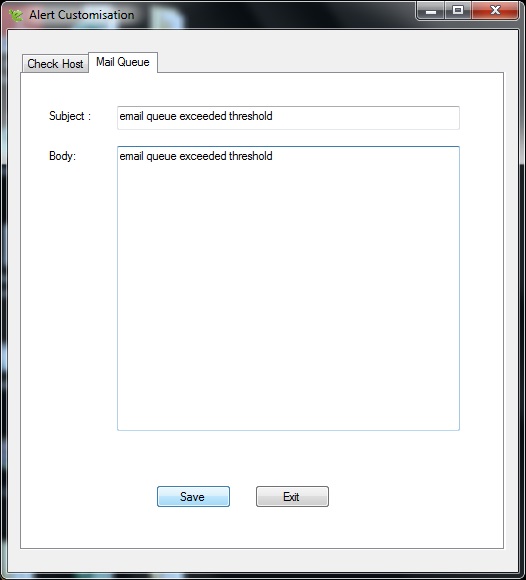
Add relevant details and “Save” the settings.
Once all settings are configured, click *Start Monitoring* which will activate the module.
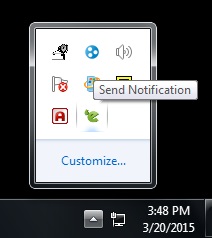
Application can be minimized to windows tray.


