From eScan Wiki
←Older revision | Newer revision→
eScan Version 14 Online Help
Firewall
Contents |
Description
Firewall is the fifth module of the eScan for ISS. It is designed to monitor all incoming and outgoing network traffic and protect your computer from all types of network based attacks. eScan includes a set of pre-defined access control rules that you can remove or customize as per your requirement. These rules enforce a boundary between your computer and network. Therefore, the Firewall feature first checks the rules, analyzes network packets, and then filters them on the basis of specified rules.
Benefits of the Firewall feature
- When you connect to the Internet, you expose your computer to various security threats. The Firewall feature of ‘e Scan protects your data when you:
- Connect to Internet Relay Chat (IRC) servers and join other people on the numerous channels on the IRC network.
- Use Telnet to connect to a server on the Internet and then execute the commands on the server.
- Use FTP to transfer files from a remote server to your computer.
- Use Network basic input/output system (NetBIOS) to communicate with other users on the LAN that is connected to the Internet.
- Use a computer that is a part of a Virtual Private Network (VPN).
- Use a computer to browse the Internet.
- Use a computer to send or receive e mail.
- By default, the firewall operates in the Limited Filter mode. In this mode, it filters only the incoming traffic. However, you can customize the firewall by using options such as Allow All and Block All and by changing the mode to Interactive Filter. The ‘e Scan Firewall also allows you to specify different set of rules for allowing or blocking incoming or outgoing traffic. These rules include zone rules, expert rules, application rules, trusted Media Access Control (MAC) address, and local IP list. You can also view detailed reports regarding the network traffic for your computer in both graphical and text only formats.
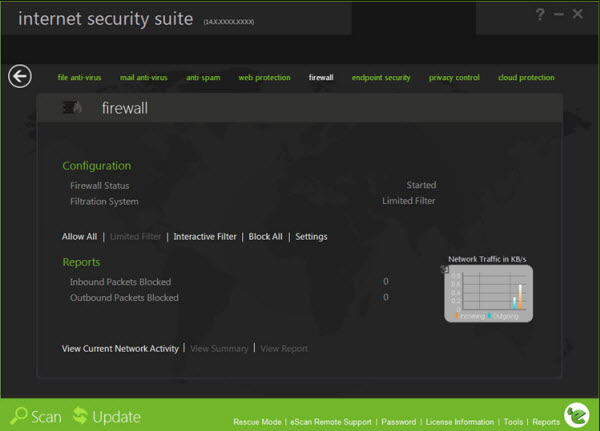
- When you select the Firewall icon, the tabbed page of ePC provides you with information regarding its status, options for configuring the module, and links to reports on the recent scans performed by the module.
- The tabbed page shows two sections: Configuration and Reports. These two sections are described as follows:
Configuration section
This section provides you with information regarding the status of the firewall, whether it is running or not. It also shows you the filtration system that the firewall is currently using.
This section displays the following information.
- Firewall Status - It shows whether the Firewall module is running or not. By default, this module runs in the Allow All mode.
- Filteration System - It shows which filtration system the firewall is using.
- In addition, you can configure the following settings.
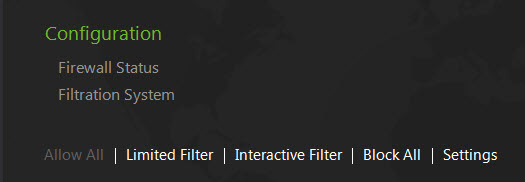
- Allow All - This link helps you disable the ‘e Scan Firewall. When you select this option, ‘e Scan stops monitoring all incoming and outgoing network traffic.
- Limited Filter - [Default] This link enables the Limited Filter mode. When the Firewall module is in this mode, it monitors all incoming traffic and helps you allow or block traffic as per the defined conditions or rules.
- Interactive Filter - This link enables the Interactive Filter mode. When the Firewall module is in this mode,it needs user intervention.It monitors all the incoming and outgoing network traffic and helps you allow or blocked traffic as per the defined conditions or rules.
- Block All - This link causes the ‘e Scan Firewall to block all the incoming and outgoing network traffic.
- Settings - This link opens the Firewall Settings dialog box, which helps you configure the firewall.
The Firewall Settings dialog box
- This dialog box has several tabs that help you configure the various firewall rules and settings.
- These tabs are described as follows:
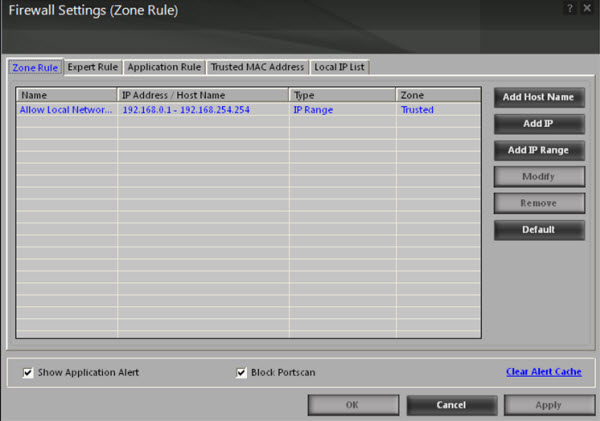
- A. Zone Rule - This tab contains settings that helps you configure network access rules that specify which IP address, host name, or IP range of computers can access your computer.
- This tab includes the following buttons.
- Add Host Name - You can click this button to add a zone rule for a given host. To add the zone rule, you must provide the name of the host for which you are adding the zone rule; the type of zone, whether it is Trusted or Blocked; and specify a name for the zone rule.
- Add IP - You can click this button to add a zone rule for a given IP address. To add the zone rule, you must provide the IP address for which you are adding the zone rule, the type of zone, whether it is Trusted or Blocked; and specify a name for the zone rule.
- Add IP Range (New Zone) - You can click this button to add a zone rule for a range of IP addresses. To add the zone rule, you must provide the range of IP address for which you are adding the zone rule, start IP address in the range, end IP address in the range; the type of zone, whether it is Trusted or Blocked; and specify a name for the zone rule.
- Modify - You can click this button to modify the zone rules related to the host name, IP address, or range of IP addresses.
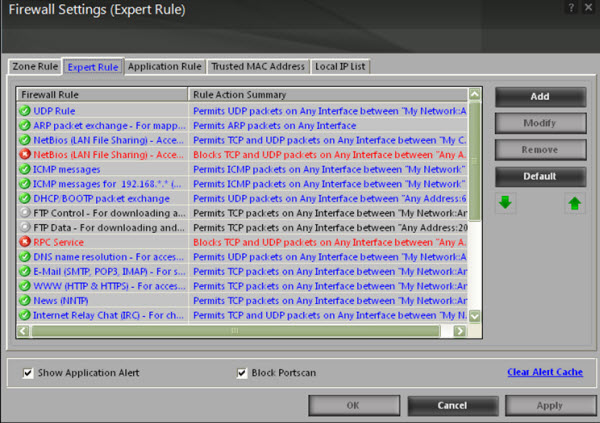
- B. Expert Rule - This tab allows you to specify advanced rules and settings for the ‘e Scan firewall. You can configure expert rules on the basis of the various rules, protocols, source IP address and port, destination IP address, and ICMP types. Note that you should configure these rules only if you have a good understanding of firewalls and networking protocols.
- This tab shows the following buttons.
- Add - This button opens the Add Firewall Rule dialog box, which helps you create a new expert rule. This dialog box helps you specify the settings for each rule and the source and destination address of each computer. It also helps you specify the advanced settings for Internet Control Message Protocol (ICMP) processing.
- Modify - You can click this button open the Modify Firewall Rule dialog box, which helps you change or modify an expert rule.
- Remove - You can click this button to delete an expert rule.
- You can click this button to move a rule down the list of rules. Here, A rule that is listed below will have a lower precedence than the rule listed above it.
- You can click this button to move a rule up the list of rules.
- When you right click any rule in the table, the context menu shows the following additional options.
- Enable Rule. This option helps you enable the selected rule.
- Disable Rule. This option helps you disable the selected rule.
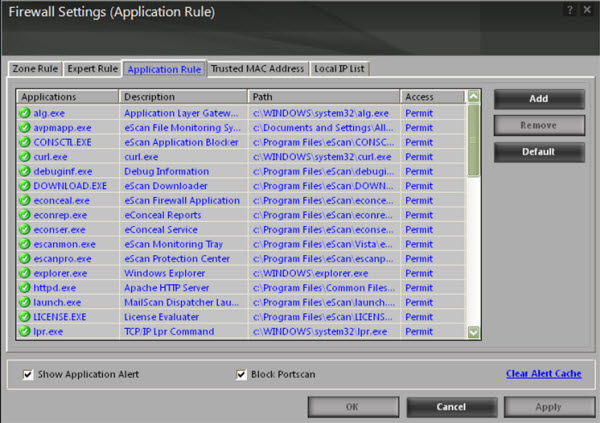
- C. Application Rule – An application rule is based on programs or applications that are allowed to or denied access to the Internet or any network based service. The Application Rule tab provides you with a default list of rules and options for configuring application rules.
- This tab shows the following buttons.
- Add - You can click this button to open the Add New Application dialog box, which helps you create new expert rules. While adding a new application rule, you must provide the path of the application for which the rule is to be applied and to specify whether the Firewall module should allow the application to run.
- Remove - You can click this button to delete an application rule.
- Default - You can click this button to revert to the default settings for application rules.
- The context menu shows the following additional options when you right click any rule in the table.
- Add - Use this option to Add Application to the Application Rule list.
- Remove - Use this option to Remove any application from the Application Rule list.
- Ask - Use this option to ask for your permission to permit or deny network access.
- Permit - Use this option to permit any added Application for network access.
- Deny - Use this option to deny network access to any application present in the Application Rule list.
- Process Properties - This option displays the properties of the selected process or file, which include the name of the file, owner of the file, copyright information, version, and path of the file.
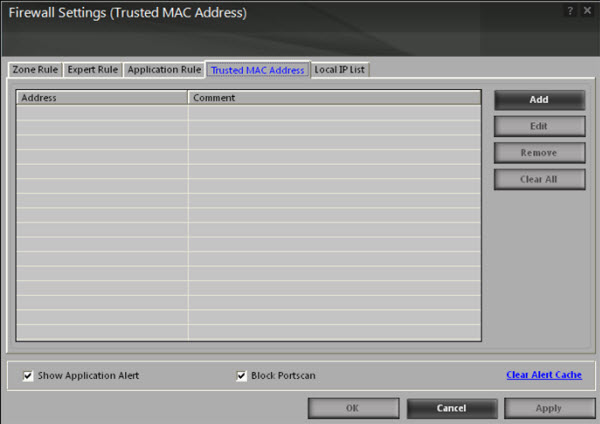
- D. Trusted MAC Address – This section contains a list of Trusted Mac Addresses. A MAC address is a hardware address that uniquely identifies each node of a network. The Trusted MAC address list is checked along with the expert rule only when The packet must be from/to a trusted MAC address check box is selected in the Add Firewall Rule dialog box and the action is as per the action specified in the rule
- This tab contains the following buttons.
- Add - You can click this button open the New MAC Address dialog box, which helps you add a MAC address to the list of trusted MAC addresses.
- Edit - You can click this button to open the New MAC Address dialog box. You can then modify an MAC address that has been added to the list of MAC addresses.
- Remove - You can click this button to delete the selected MAC address.
- Clear All - You can click this button to delete all the MAC addresses in the list of MAC addresses.
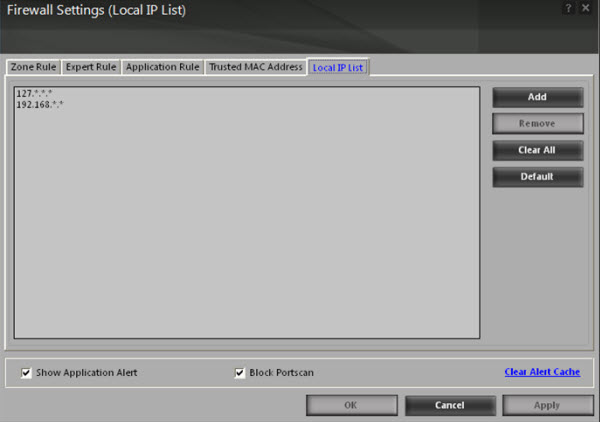
- E. Local IP List – This tab contains the list of all the local IP addresses.
- It includes the following options.
- Clear Alert Cache - You can click this option to clear all the information, such as previous actions taken or blocked programs stored in the firewall’s cache.
- Show Application Alert - [Default] Select this check box, if you want to receive firewall alert when an application is blocked as per an application rule.
- Block Portscan - [Default] Select this checkbox, if you wish to block all Portscan attempts made by Hackers.
- It also includes following buttons.
- Add. You can click this button to add an IP address to the list of local IP addresses from which you need to allow traffic to your computer.
- Remove. You can click this button to delete the selected IP address.
- Clear All. You can click this button to delete all the IP addresses in the list of IP addresses.
Reports section
This section displays the following information.
- Inbound Packets Blocked. It shows the total number of inbound packets that were blocked by the firewall.
- Outbound Packets Blocked. It shows the total number of outbound packets that were blocked by the firewall.
- The report section also shows a Network Traffic Monitor, which shows the incoming and outgoing network traffic in Kilobytes per second (KBps).
- In addition, you can view the following reports.
- a. View Current Network Activity – This link opens the ViewTCP tool, which displays the latest activity report of the all active connections and established connections. It also provides you with information regarding the process, protocol, local address, and the remote address and the status of each network connection.
- b. View Summary – This link helps you view the firewall report either in the form of detailed report of a summary report. A summary report displays information regarding the rules that has been invoked and applied by the firewall. These rules may include application rules, expert rules, zone rules, and Trojan rules. A detailed report includes information about the rules regarding the network activities and shows data in the form of graphs and charts.
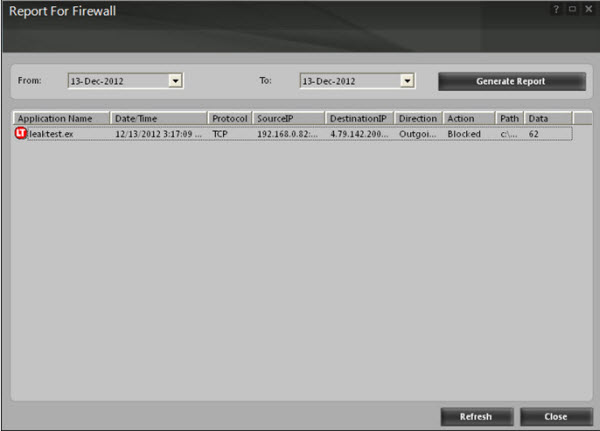
- c. View Report – This link displays the Report for Firewall window. . This window displays the report for the Firewall module for a given range of dates in a tabular format when you click the Generate Report button.
The Report for Firewall window
- This window displays the report for the Firewall module for a given range of dates in a tabular format when you click the Generate Report button.
- Generate Report. You should select a range of dates and then click this button to generate a report for the Firewall module for that range of dates.
