From eScan Wiki
| · eScan · MailScan · Technologies | · Technical Info · Security Awareness · User Guides |
[edit]
eScan Version 11(and above) Online Help
Privacy Control
Contents |
[edit]
Description
- This module deletes all the temporarily information stored on your computer and protects your confidential information from theft. ‘e Scan Browser Cleanup provides an easy and efficient method of protecting your privacy. It allows you to use the Internet without leaving any history or residual data on your hard drive by erasing details of sites and Web pages you have accessed while browsing.
- When you select the Privacy Control icon, the tabbed page of ePC provides you with information regarding this module. It provides you with options for configuring the Privacy Control module and helps you view reports on the recent scans performed by the module.
- The tabbed page shows two sections: Configuration and Reports. These two sections are described as follows:
[edit]
Configuration section
- This section provides you with information regarding the status. It also shows you the default action that Privacy Control will perform when it detects a malicious object.
- This section displays the following information.
- Privacy Control Status - Privacy Control Status. It shows the mode in which the Privacy Control module is running. This mode can be the Manual mode or the Scheduled mode.
- Privacy Control Status - Next Scheduled Cleanup. It displays when Privacy Control will run next.
- In addition, you can configure the following settings.
- Clear Now – This link clears the information specified under Options in the Browser Clean up dialog box.
- Settings – This link opens the Privacy Control Settings dialog box, which helps you configure Privacy Control for real-time monitoring.
- The Privacy Control Settings dialog box
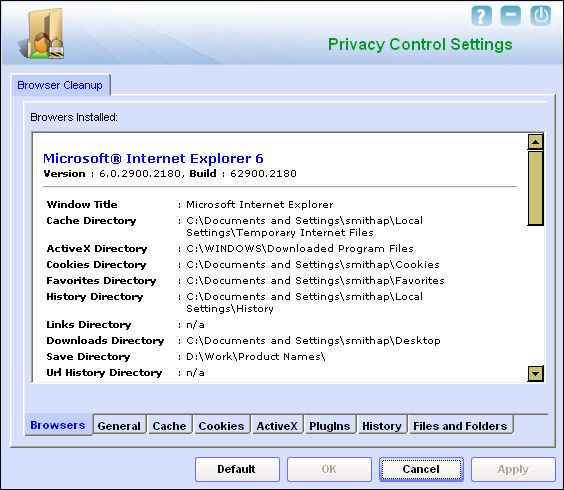
- This dialog box has a Browser Cleanup tab, which allows you to make configuration settings. It helps you clear all the unwanted files created on the computer when you are browsing the Internet. The Browser Cleanup tab has several tabs, which are described as follows:
- Browser Cleanup Tab This tab displays information regarding all the browsers installed on your computer.
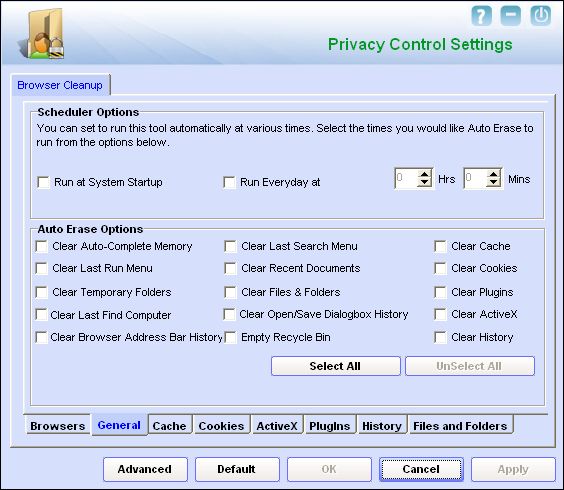
- General Tab This tab helps you configure which unwanted files created by Web browsers by other installed software should be deleted.
- I. Scheduler Options Section You can set the scheduler to run at specific times and erase information such as your browsing history from your computer. The following settings are available under Scheduler.
- Run at System Startup – This enables and auto executes the Privacy Control when the computer starts up and performs the desired auto erase functions.
- Run Everyday at – This enable and auto executes the Privacy Control module at the specified time and performs the desired auto erase functions. You can specify the time within the hours and minutes boxes.
- II. Auto Erase Options Section Whenever you visit a Web site, the browser stores traceable information in certain folders, which can be viewed by others. ‘e Scan allows you to remove all traces of Web sites that you have visited. To do this, it auto detects the browsers that are installed on your computer. It then displays the traceable component and default path where the temporary data is stored on your computer. You can select the following options based on your requirements.
- (a) Clear Auto-Complete Memory – Auto Complete Memory refers to the suggested matches that appear when you type text in the Address bar, the Run dialog box, or forms in Web pages. Hackers can use this information to monitor your surfing habits. When you enable option, Privacy Control will clear all this information from the computer.
- (b) Clear Last Run Menu Command – When you enable this option, Privacy Control will clear this information in the Run dialog box.
- (c) Clear Temporary Folders – When you enable this option, Privacy Control will clear the files in the Temporary folder. This folder contains temporary files installed by software. Clearing this folder creates space on the hard drive of the computer and boosts the performance of the computer.
- (d) Clear Last Find Computer - When you enable this option, Privacy Control clears the name of the computer for which you searched last.
- (e) Clear Browser Address Bar History – When you enable this option, Privacy Control clears the Web sites from the browser’s address bar history.
- (f) Clear Last Search Menu – When you enable this option, Privacy Control clears the name of the objects that you last searched for by using the Search Menu.
- (g) Clear Recent Documents - When you enable this option, Privacy Control clears the names of the objects found in Recent Documents.
- (h) Clear Files and Folders - When you enable this option, Privacy Control deletes selected Files and Folders. You should use this option with caution because it permanently deletes unwanted files and folders from the computer to free space on the computer.
- (i) Clear Open/Save Dialog Box History - When you enable this option, Privacy Control clears the links of all the opened and saved files.
- (j) Empty Recycle Bin - When you enable this option, Privacy Control clears the Recycle Bin. You should use this option with caution because it permanently clears the recycle bin.
- (k) Clear Cache - When you enable this option, Privacy Control clears the Temporary Internet Files and history.
- (l) Clear Cookies - When you enable this option, Privacy Control clears the Cookies stored by Web sites in the browser’s cache.
- (m) Clear Plugins - When you enable this option, Privacy Control removes the browser plug-in.
- (n) Clear ActiveX - When you enable this option, Privacy Control clears the ActiveX controls.
- (o) Clear History - When you enable this option, Privacy Control clears the history of all the Web sites that you have visited.
- In addition to these options, the Auto Erase Options section has two buttons:
- Select All - You can click this button to select all the auto erase options.
- Unselect All - You can click this button to clear all the selected auto erase options. You can either schedule the auto erase tasks to run automatically or remove the traces manually.
- When you select the General tab, the Advanced button is displayed.
- Advanced. This button opens the Advanced Browser Cleanup Options dialog box. By using this dialog box, you can select the unwanted or sensitive information stored in the browser’s cache that you need to clear.
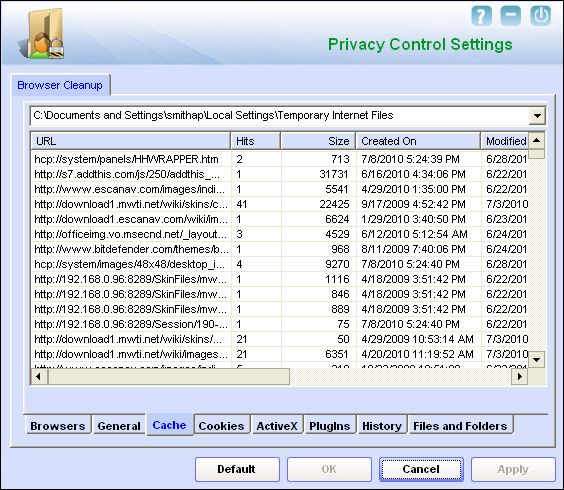
- Cache Tab This tab displays the list of files stored in the Temporary Internet Files folders in a tabular form. The table displays information such as the URL of the Web page, number of hits, size of the Web page, date of creation, date of modification, date of access, and the path where the page is downloaded and stored on the computer.
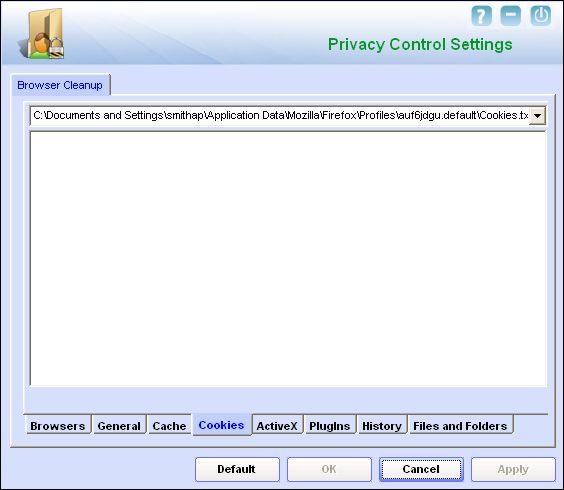
- Cookies Tab This tab displays the list of cookies installed on your computer. The table displays information such as the name, number of hits, size, date of date of modification, date of access, date of expiry, and full path of the cookie file.
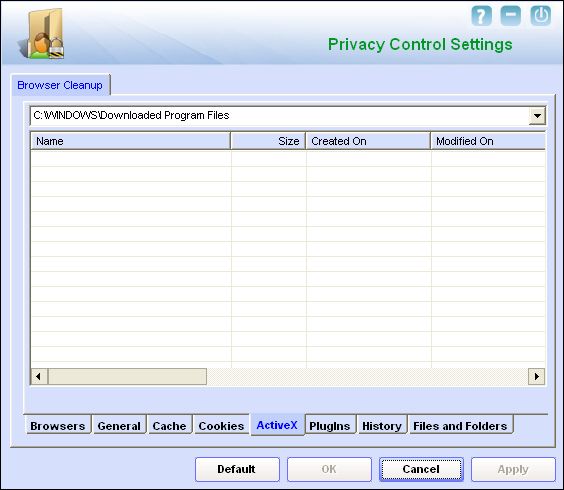
- ActiveX Tab This tab displays the list of ActiveX controls installed on your computer. The table displays information such as the name, size, date of creation, date of modification, date of access, full path, version, description, company, and comments.
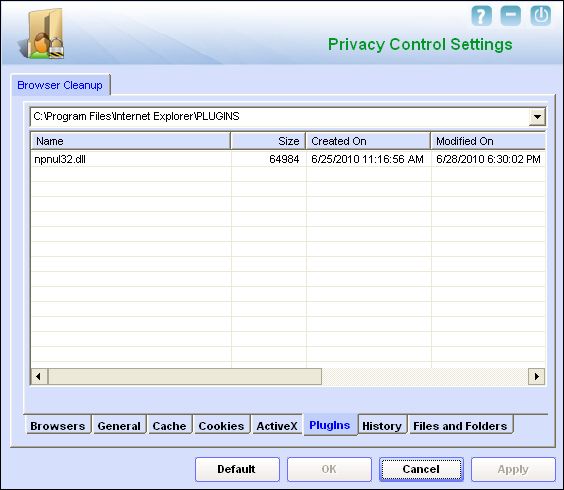
- PlugIns Tab This tab displays the list of plug-in installed on your browser. The table displays information such as the name, size, date of creation, date of modification, date of access, full path, version, description, company, and comments.
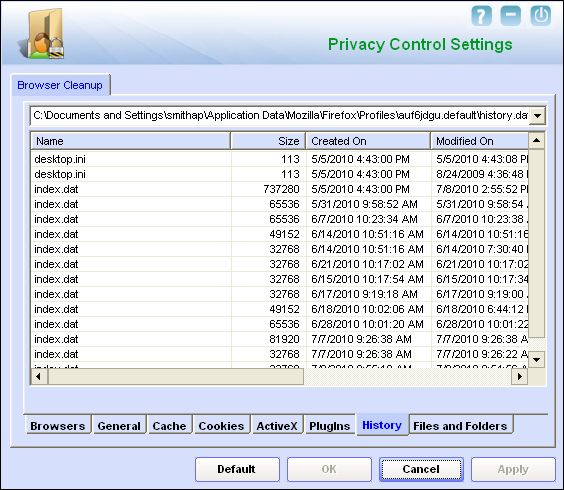
- History Tab This tab displays the list of Web sites that you have visited and the files that you have opened. The table displays information such as the name, size, date of creation, date of modification, date of access, and full path of each file.
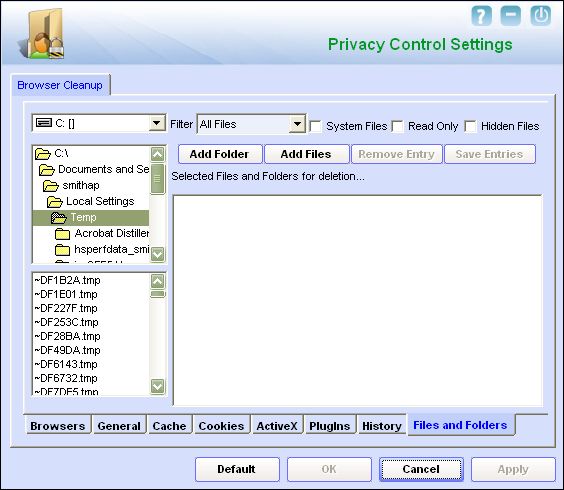
- Files and Folders Tab This tab helps you select the files and folders that you need to delete.
- The drive list - You should select the drive on which the file that you need to delete from this list.
- The directory list - You can select the directory in which the file that you need to delete from this list.
- The file list - You should select the file that you need to delete from this list.
- Select Files and Folders for deletion - This list contains the list of files and folders that you have marked for deletion.
- The tab also displays the following filters.
- Filter - This list provides you with a list of file types. The list of files marked for deletion will be filtered based on the selected file type. The types of filters available are as follows:
- All Files
- Text Files
- Executables
- Icon Files
- Shell Links
- URLs
- Images
- System Files - You should select this check box if you need to view only the system files in the list.
- Read Only - You should select this check box if you need to view only the read-only files in the list.
- Hidden Files - You should select this check box if you need to view only the hidden files in the list.
- The tab displays the following buttons.
- Add Folder - You can click this button to add the folder selected in the directory list to the list of files and folders to be deleted.
- Add Files - You can click this button to add the folder selected in the file list to the list of files and folders to be deleted.
- Remove Entry - You can click this button to remove the selected file or folder from the list of files and folders to be deleted.
- Save Entries - You can click this button to remove the selected file or folder shown in the list of files and folders to be deleted.
[edit]
Reports section
- This section displays the following information.
- Last Cleaned on – It shows the date and time of the last activity of the Privacy Control module.


